It used to happen to me all the time (not the chandelier bit – thankfully those records are sealed), but the bad pic bit. I loved taking pictures but hated what I was getting out of them. Sub-par or missing travel pics can be heartbreaking – in most cases you only get one shot at it, so getting it right is extremely satisfying.
I became seriously engaged in photography about five years ago, after being disappointed in my own travel pics. I vowed to work on my skills and produce work worthy of the places I visited. Sometimes I do, sometimes I don’t, but I’ve come a long way in those five years of global adventure and camera toting.
So having said that, let’s get to it! Here are eight tips that have helped me to improve my travel photography:
1. Include pictures of locals
Please, for the love of all things good and holy, include people in your photos. People tell great stories. If you want to capture a region, look to their people. I used to come home with pictures of buildings and mountains, and while they were perfectly fine buildings and mountains, they lacked the emotional content and energy of connecting with someone real. So take pictures of the people you meet (always ask permission) and you’ll be bringing more emotional content to your own storytelling when you get back home. The photo below was taken at the Baan Tong Luang hilltribe village north of Chiang Mai:

Don’t limit yourself in this – expand your comfort zone and include more people where and when possible. Instead of just taking pictures of food when at a night market (as below, in Taiwan at the Ning Xia Night Market), include the people serving you…

…as well as others enjoying the environment.

If you’re going to a concert or live event, include more people in your shots (ie. the crowd) to capture the energy. In short, don’t be afraid to bring fellow humans into your travel photography – it will make a world of difference!

2. Plan your day, and be patient.
If you want a specific image, plan for it. Plan your day so you get up early and catch the sunrise, or plan to be in the right place to catch your favourite landmark during “golden hour” as the sun is setting. Some great photographs are pure luck – serendipity does exist – but far more often great photos are a result of being in the right place at the right time on purpose (and then having the patience to snap the shutter when the time is right).
Patience also plays a big role. The picture below was taken at Watkins Glen, New York, on a morning when I had to wait about 11 minutes for a couple to move so I could get the waterfall image I wanted. Often you’ll hear people complain “I could have had the perfect shot but (fill in the blank) was in the way!” Be patient. Wait for the right opportunity. If something or someone is in your way, have a Coke, have a smile, and take a deep breath. Your chance will come. Just think of it as extra time at a place you obviously wanted to go to.

Some of you might be saying, “I don’t want to plan my whole day around a photo – I’m on vacation!” Fair enough. I hate over-planning as much as the next guy, but if you’re looking for a specific shot, I’m just saying that a little planning can go a long way. 🙂
3. Bring the right equipment.
It can be a pain to lug around heavy photo gear – especially when you’re travelling – but it’s amazing how easily you can build a small but versatile photography set-up without breaking the bank (or your back when carrying it!).
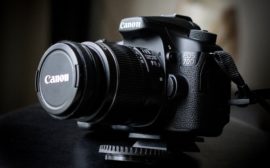
For me, my essentials are my camera body(s), and three simple lenses. For years I used the basic entry level Canon Rebel T3, but have recently upgraded to the Canon EOS 70D (a phenomenal mid-range DSLR that won’t break the bank). Most of the shots you’ll see on this website were taken with the Rebel T3, so dismiss the notion that you need an insanely expensive camera to do good work. Plus, I tend to travel to places where toting around a really expensive camera is a very bad idea – so getting more out of equipment that is a bit more modest is a good thing.
As for the lenses, I use three inexpensive but very effective Canon lenses to get the job done:
– Canon 18-55mm f/3.5-5.6: Kit lens, inexpensive, good for wide shots, and HDR landscape images. This shot of a lone Joshua tree (near Rachel, Nevada) was taken with the 18-55.

– Canon 50mm f/1.8: Known as the “nifty fifty” this is a great little prime / portrait lens that can be bought for less than $150. I’ve used the nifty fifty for everything from basic studio work to portraits on the fly. See below for a recent portrait taken in Northern Thailand (near Chiang Rai) with the 50:

– 55-250mm f/4-5.6 IS: This is an excellent zoom lens for the money, and with image stabilization will allow you to zoom all the way out to 250mm and still hold things steady. I use the 55-250 for sports, wildlife, and some portrait work. The photo below was taken with the 55-250 at the Muay Thai fights in Bangkok, October 2015.

Having all three lenses allows me to cover everything I need as far as focal range is considered. These lenses are light, versatile, and inexpensive. I can fit all three as well as a camera body into a small camera bag or easily into my small day backpack (with room to spare).
The other piece of gear that I have recently been packing around is a small, light tripod that easily fits in a medium suitcase (or hooks onto my backpack). I use it for HDR photography and love it – on a recent trip to Chiang Mai I went nuts with it, allowing me to produce some images like the one of Wat Chedi Luang below:

You will most likely have a different set-up; the key here is to think about how you can cover the range of photos you want to take in a compact, easy to carry set-up.
4. Take the cliché pic, then get creative and ask ‘what if’.
Everyone who goes to Peggy’s Cove, Nova Scotia, takes a picture of this lighthouse:

And they should. It’s a beautiful lighthouse in a picturesque setting. Take it, post it, tell your friends about it. This picture is proof you were there, and sometimes it’s fun to take the cliché shot. If you’re in Pisa, take a pic pretending to hold up the Leaning Tower. Take the tried and true shot of the Eiffel Tower in Paris. Take them all, put them in the bank, and you’ll always have them. You might only be there once – don’t regret missing a shot you might like to have.
But once you have that, start to get creative. Make the shots yours. A great guitar teacher I have been studying with often says to me “IF this, THEN what?” – the same applies to photography. Ask, “what if I do this in a more artistic way?” For me, I wanted to try the lighthouse in a more artistic setting, so I asked, “what if I flip it black and white and go wider with it?” It’s a totally different image, and tells a different story. I’m glad I asked “what if”.

Walk around the back, ask yourself “what if I tried this from a different angle?”. Your lighting and perspective totally changes:

And finally, don’t be afraid to look away from the cliché landmark – sometimes there is some really fascinating stuff right around the corner. Turn around from the lighthouse, walk fifty feet, and you have this gorgeous rocky coastline to shoot where a single tourist won’t get in your way.

So take the tried and true landmark shot. Have fun with it. But then get creative, ask “what if” and your travel shots will stand out. You will have unique perspectives of places that others only have the basic shot that millions of others have.
5. Make yourself the star of the show.
I hate having my picture taken. But I also know that my friends and family want to see me in pictures, and as a travel writer I know it’s an integral part of connecting with my audience. So I have been working hard to include myself in travel photos more often. Whether it be on the back of a motorbike in Vietnam:


Or questing for the ultimate hot dog in Las Vegas:

Make sure your travel photos include a critical element – you! You’ll be sorry if you visit some amazing places but have no record of yourself having been there. And while I *know* you’re not hunting for likes or other forms of social media love, if you do include yourself in your posts you’ll see the thumbs up icon a lot more frequently. 😉
6. Capture the small details.
If you were making a movie you would call this “shooting B Roll.” Shoot some of the small details that aren’t the stars of the show but still fill in some of the blanks. So if you’re talking about the amazing buffet at the Majestic Grande in Bangkok, don’t just snap a pic of your food, but include things you might talk about later – like an unexpected honeycomb at a buffet. This is the only time I’ve taken honey directly from the comb, so it definitely warranted a snap.

I take pictures of all kinds of things on the road, small details that might be useful or helpful later when I’m recounting my tales from far off lands to others. Think of yourself as a storyteller – few things tell stories better than pictures. So take the picture of the building you find interesting, the rock formation you think is cool, or the weird cutlery you’ve never seen before. If you don’t use the picture, delete it – no harm done. But if you don’t take the shot and then want to talk about it later you might be sorry you didn’t. Don’t get me wrong – I’m not saying you need to be a slave to your camera, snapping everything in sight, but I am saying that small details can enhance your storytelling, so be creative.
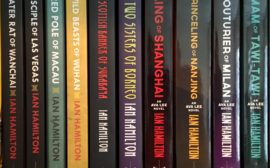
One other thing I always snap is a picture of signs of the places I’ve been. If I’m putting together a photo collage or online portfolio it rounds out the set and helps to tell the story. The signs themselves aren’t usually all that compelling, but as part of a larger story-telling component, they can be a big help. They also remind me of things like where I was and how to spell the name of the attraction / location.

7. Get used to shooting in low light.
Things happen in the dark. I have the scars to prove it.
If you’re interested in capturing these things while on the road, learning to shoot in low light will make this world a happier place for you. Museums, concert halls, pubs, dimly lit rooms, outside when the sun is somewhere else – they’re all dark places, and likely to happen to you now and then.

Outdoors at night, TBEX opening ceremonies – Bangkok, Thailand
Learning to shoot in low light was a quest of mine a few years ago, and am I ever glad I made the effort. In the last year alone I’ve had dozens of opportunities to put these skills to use. Without getting too technical, here are three quick low-light tips that may help:
– The idea with low light photography is to use a fast lens if possible, meaning a low “f number” (ie. f/1.8 or f/2.8). This is all about light – fast lenses allow you to shoot at wider apertures (allowing max light into the lens) and shoot at quick shutter speeds. So go looking for a lens like my “nifty fifty” (the Canon f/1.8 50mm) and you’ll be off to a good start (there is a Nikon equivalent and most brands have something similar).
– Don’t be afraid to bump up the ISO. With all DSLRs (and most point and shoots) you can manage the ISO settings. With increased ISO means more noise, so you’ll have to experiment, and all cameras are different, so you need to know where the threshold is. On my Rebel T3 I found that if I went above ISO 1600 photos became really noisy and grainy – I was often unhappy. But up to 1600 I could usually make it work. On my EOS 70D I have recently shot at ISO 3200 with no problems at all. So the quality of your camera may dictate which ISO you choose, but the general idea is not to be afraid to experiment with pushing it up a bit – you can always minimize noise when you process the photo, and the most important thing is getting the shot. Don’t let increased ISO scare you. Just remember that ISO, shutter speed, and aperture all impact one another – if all of this is new to you, read up on some basics and it will make a world of difference in your photography.
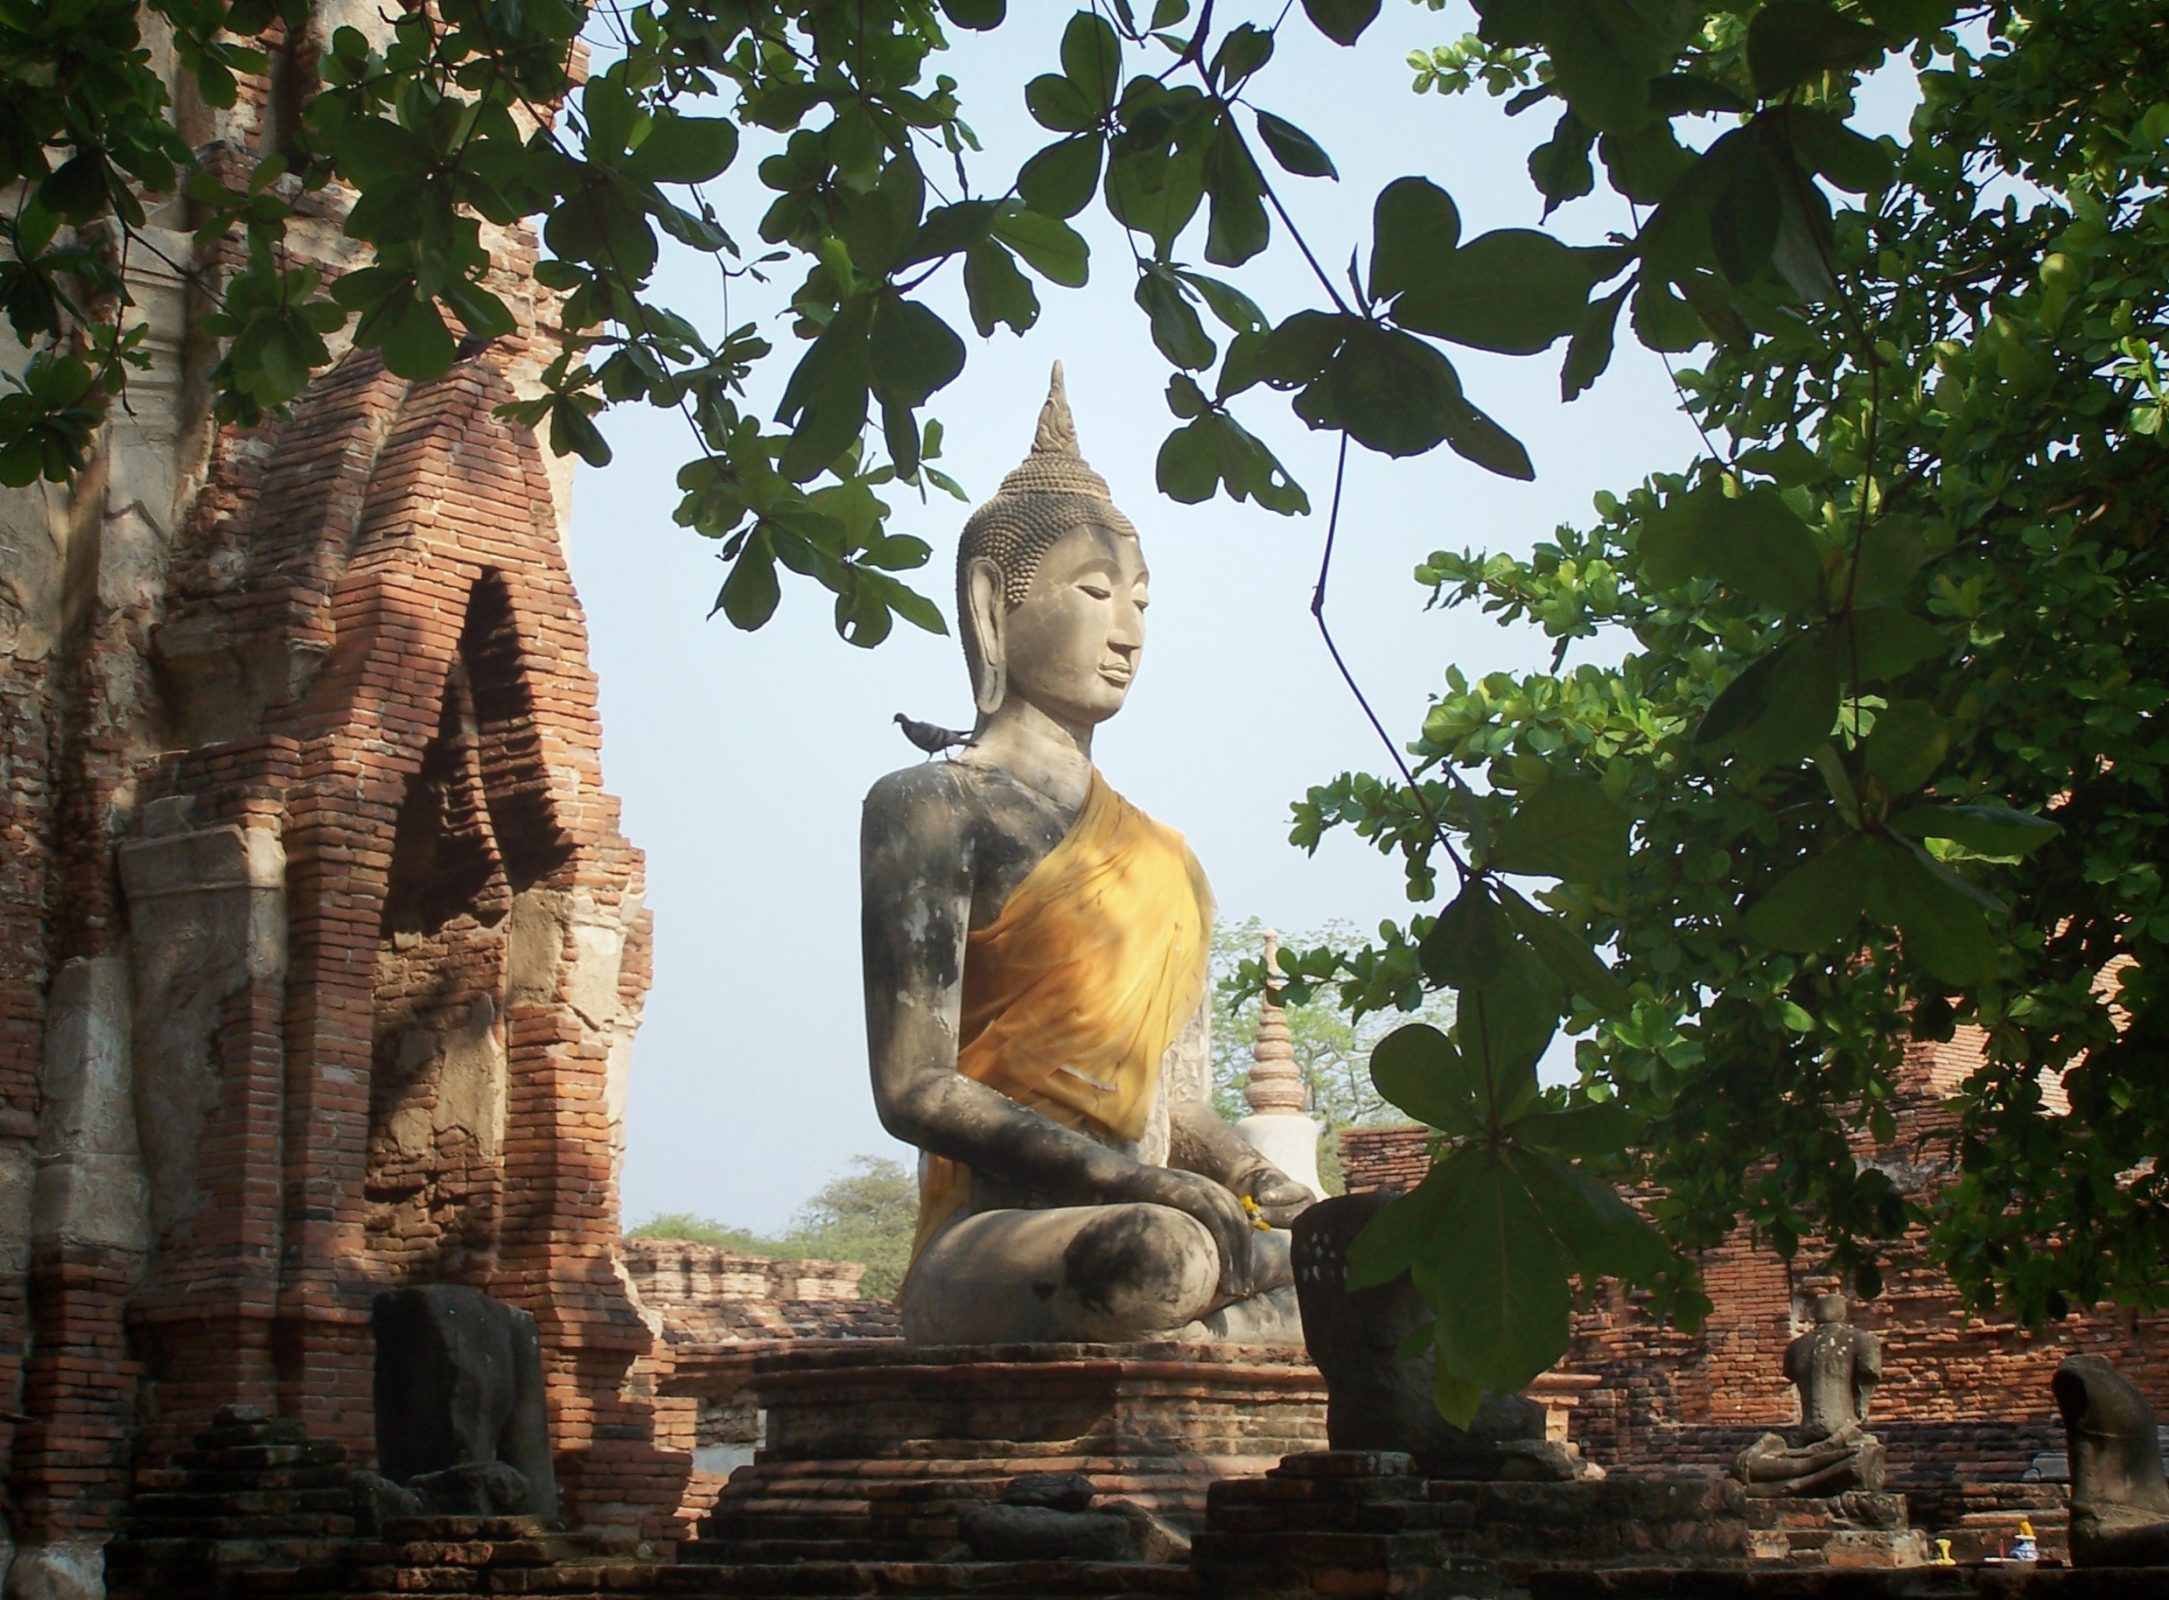
– Bust out the flash. I don’t really like using flash, but on occasion it’s needed. If I do use it, I always try to bounce it off the ceiling (if the ceiling is low enough) or use a diffuser to avoid the harsh look that flash can produce. Read up on using flash for low-light conditions and it will help a whole heap. Here’s a photo taken under the umbrella of a tree using a diffused flash to create nice lighting conditions in a dark environment:

8. Find the fun! Look for energy and expression in the things you shoot.
Travel – for most of us – is an adventure, meant to be fun. Capture people having fun and you’ll come close to recounting what it was like to be there.

Always find the fun. Energy and expression make pictures that much more interesting, and you’ll have some fantastic memories to look back on.
Re-cap:
1/ Include pictures of locals
2/ Plan your day and be patient
3/ Bring the right equipment
4/ Take the cliche pic, then get creative and ask ‘what if’
5/ Make yourself the star of the show
6/ Capture the small details
7/ Get used to shooting in low light
8/ Find the fun!
How about you? What tips have helped you to take better pics while on the road? Comment below, and thanks for reading! Cheers –